How to fill in form attributes? – Detailed look
How to fill in form attributes? – Detailed look
Home » Help Center » How to fill in form attributes? – Detailed look
This page provides detailed instructions on how to fill in form attributes. For a quicker overview on how to send forms, refer to How to start a new form page.
Navigate to the Forms Page
To initiate a form, make sure that you have navigated to the Forms page and have clicked on the plus icon on the bottom right corner to start a new form. You will then be asked to select the form template that you would like to initiate. Use the filtering options on the left to select the process you would like to initiate from the drop down list on the right.

Fill in the Form
Once you have selected your form template, the form for the selected process will appear on your screen. Fill in the information provided on the form. Forms can be completed in 3 simple steps before sending.
- Fill in standard form data,
- Fill in the custom attributes, and
- Select attachments if required.
Step 1: Fill in Standard Form Information
All forms are initiated by completing the standard form information. Although forms can be customized with additional attributes, the standard form information will be the same for all forms, regardless of what process you have initiated.
Below is an explanation of the main standard form information attributes:
- Inspection Number: The Inspection number is a unique auto-assigned number for each inspection form. The number is determined by the process type that you have selected and the number of forms already in the system for this process. The exact numbering convention is determined by the project admin.
- Title: The title will by default be the form template name but can manually be changed by the user.
- Revision: The revision number will be a drop down with an ordered list determined by your project admin. Revisions that have previously been used for earlier superseded versions of the chosen form will appear in light grey and cannot be selected. The next newest revision will appear in bold and will also be the default revision for the form. Either the current revision or the next revision in the sequence can be selected.
- Location: Locations can be defined at various levels, ranging from a general to a specific location (such as ‘A Block’>’Level 5′>’Room 305′). The minimum level of detail that must be selected for the location attribute may differ by the form template that is used.
- Status: The status of the form will be selected from a drop down. You will only see the statuses in the dropdown that your organization role has been given access to.
All mandatory fields will be marked with an asterisk (*). Once you are finished filling in the standard form information, click ‘Next’ on the bottom right corner of the page.
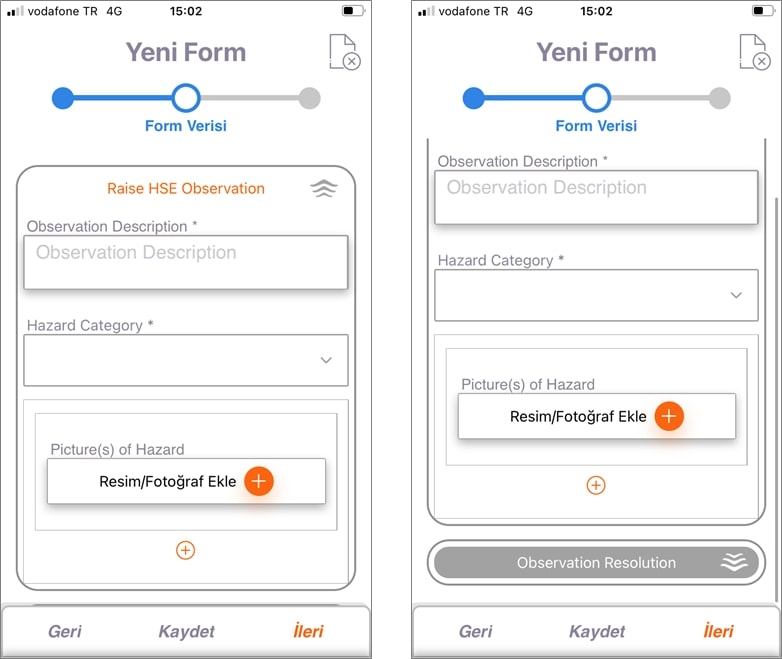
Step 2: Fill in Form Data
As the second step of initiating a form, you will be asked to fill the form data. The attributes in the form page will be different for each form template. You may have to choose from a variety of Yes/No/NA questions, fill in text fields, put signatures, or choose from drop down lists, based on the process designed by your project admin.
However, you may only fill in sections of the form (also referred to as ‘sub-forms’) that your organization role has access to. The areas that your organization role has access to will be visible on the ‘Form Data’ page as shown in the image below. Any part of the form that is not made available to your organization role will be hidden under a grey heading as shown in the visual on the right.
Scroll down on the form in order to fill in all attributes that are assigned to your organization.
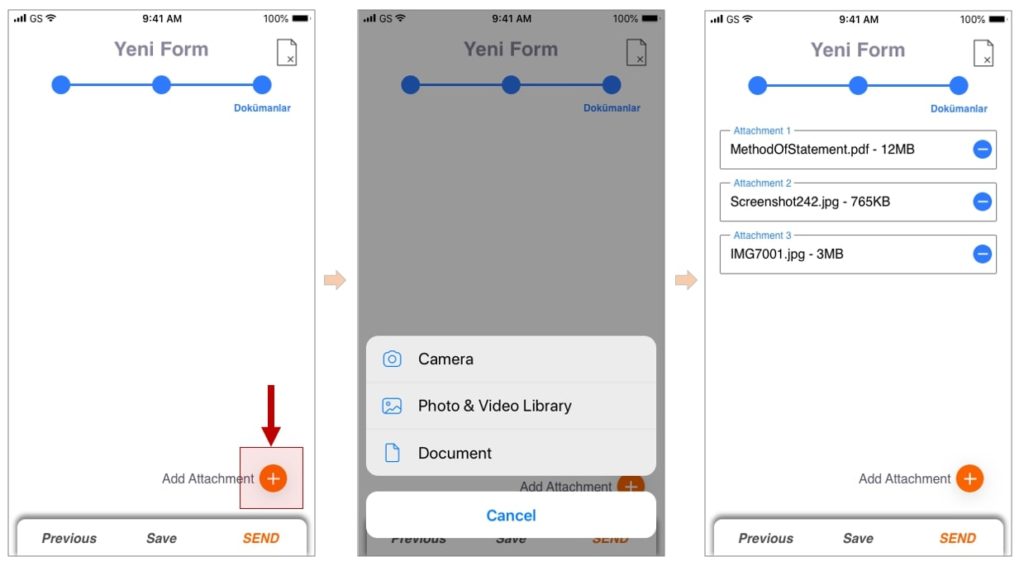
Step 3: Send attachments
You may need to attach documents to your form before sending. When you have completed filling in the form and have clicked on ‘Next’ to proceed to the final page, you will be directed to the ‘Documents’ page. If you do not need to attach any documents to your form, you may click on ‘Send’ to proceed to the final page to send the form.
If you do need to attach documents to your form, click on the orange plus icon on the bottom right of the documents page. You will then be asked to select an attachment either by taking a picture, or accessing an attachment from your Photo Library or your Documents. Either take a picture with your mobile, or select the appropriate attachments on your device.
You can continue to click on the plus sign to add further attachments.
In order to remove any of the attachments, click on the minus sign next to each attachment. When you are done, click ‘Send’ to proceed to the next page.
For a more detailed description on managing attachments on Crane, take a look at How to manage attachments on forms – Detailed look page.